用微信小程序实现tabs选项卡效果的方法介绍
发布时间:2017-04-06 15:06 22来源:www.ushendu.com
很多小伙伴还不了解微信小程序的一些其他应用,今天小编给大家介绍用微信小程序实现tabs选项卡效果的方法,简单实用哦,有兴趣的小伙伴赶紧过来学习一下吧!
首先点击导航的时候需要两个变量,一个存储当前点击样式类,一个是其它导航默认的样式类
选项卡内容列表同样也需要两个变量,一个存储当前显示块,一个存储的是其它隐藏的默认块
使用三目运算通过点击获取导航索引,根据索引判断是否添加当前类【备注,这里我将点击事件绑定在父级导航栏,通过target对象得到点击触发的事件对象属性】
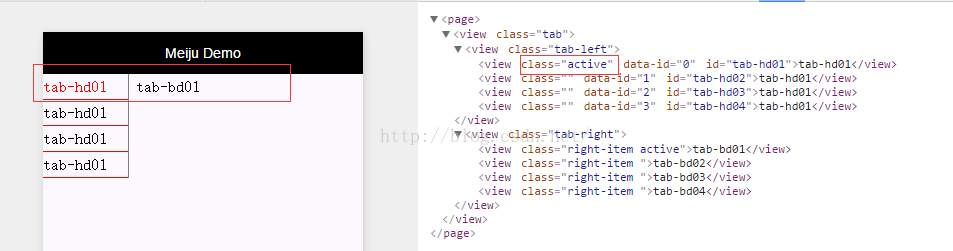
请结合如下效果图:
接下来直接查看源码:
demo.wxml:
<viewclass="tab">
<viewclass="tab-left"bindtap="tabFun">
<viewclass="{{tabArr.curHdIndex=='0'?'active':''}}"id="tab-hd01"data-id="0">tab-hd01</view>
<viewclass="{{tabArr.curHdIndex=='1'?'active':''}}"id="tab-hd02"data-id="1">tab-hd01</view>
<viewclass="{{tabArr.curHdIndex=='2'?'active':''}}"id="tab-hd03"data-id="2">tab-hd01</view>
<viewclass="{{tabArr.curHdIndex=='3'?'active':''}}"id="tab-hd04"data-id="3">tab-hd01</view>
</view>
<viewclass="tab-right">
<viewclass="right-item{{tabArr.curBdIndex=='0'?'active':''}}">tab-bd01</view>
<viewclass="right-item{{tabArr.curBdIndex=='1'?'active':''}}">tab-bd02</view>
<viewclass="right-item{{tabArr.curBdIndex=='2'?'active':''}}">tab-bd03</view>
<viewclass="right-item{{tabArr.curBdIndex=='3'?'active':''}}">tab-bd04</view>
</view>
</view>
demo.js:
Page({
data:{
tabArr:{
curHdIndex:0,
curBdIndex:0
},
},
tabFun:function(e){
//获取触发事件组件的dataset属性
var_datasetId=e.target.dataset.id;
console.log("----"+_datasetId+"----");
var_obj={};
_obj.curHdIndex=_datasetId;
_obj.curBdIndex=_datasetId;
this.setData({
tabArr:_obj
});
},
onLoad:function(options){
alert("------");
}
});
demo.wxss:
.tab{
display:flex;
flex-direction:row;
}
.tab-left{
width:200rpx;
line-height:160%;
border-right:solid1pxgray;
}
.tab-leftview{
border-bottom:solid1pxred;
}
.tab-left.active{
color:#f00;
}
.tab-right{
line-height:160%;
}
.tab-right.right-item{
padding-left:15rpx;
display:none;
}
.tab-right.right-item.active{
display:block;
}
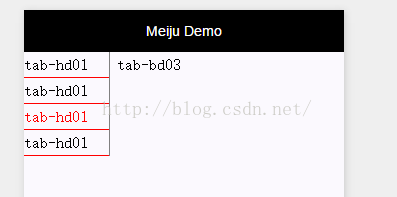
最终演示效果如下:
以上就是今天分享的全部内容,百度一下“u深度”,更多手游资讯、时事新闻、软件教程一一为你呈现,还等什么,赶紧关注起来吧!
下一篇:恢复电脑硬盘数据的方法教程